
Stage 16: Brace for Impact!
Stuck in a holding pattern as I await the activation of my Maximus Arcade Front End, I decided I needed to get my arcade in a more functional state for game testing and the like.
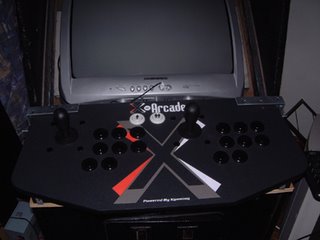
While the CPU, controls and display all work fine, the X-Arcade joystick was somewhat wobbly, as it was merely resting in the hole left vacant by the now trashed Tetris joysticks. My plan was to clamp these controls in place somehow to better resist the pulls and yanks on the joysticks from myself and over-zealous friends who would surely help me test this thing out.
 I enlisted my pal Eric Miller to help me, as Eric is a knowledgable craftsman and has a decent selection of tools at his disposal. He dropped by the Labratory and after taking a few measurements (including a hilariously bad schematic drawn by yours truly), we hit the Canadian Tire around the corner for some tools and hardware.
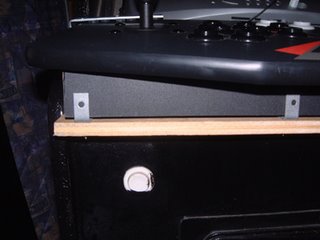
The plan was simple: I was wary of actually drilling into the X-Arcade unit at this point, since the final design of the cabinet had not yet been decided. So we were going to attack a flat piece of wood under the contols to act as a "shelf" for the controls to sit on. This shelf would have a series of L-brackets on the outer lip to help prevent the controls from sliding forward. And two more larger L-brackets would be clamped down at the top of the controls, thus preventing the controls from tipping when leaned upon.

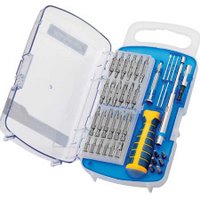 Of course, anytime I have money and walk into Canadian Tire I lose my mind and begin to purchase things I don't really need. So after a long time scrutinizing L-brackets and performing some imperial to metric conversions, I soon found myself with $50 worth of tools on top of the $8 in hardware we originally came to purchase, including some nice new Titanium drill bits and a dope multi-head screwdriver to replace the piece of shit that came with the tool set I had picked up months previous. Tools are fun, grunt grunt grunt.
Heading back home, we soon found a problem with the plan - both of Eric's batteries for his nifty cordless circular saw were dead as doornails. So it was back to Canadian Tire to buy a hand saw - sometimes, the basic shit is the best, it seems.
After cutting a piece of 1/2 inch plywood to fit, we soon had the shelf ready to go. We drilled a few holes and a few screws later the shelf was solid as can be, and the four brackets at the front worked like a charm. As a bonus, it could be pulled out when desired, which would surely help the refurbishing process down the line.
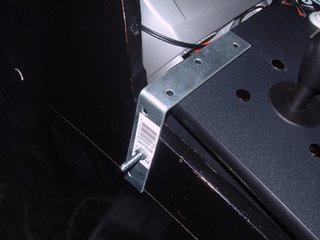
A couple more holes in the side and we soon had the two giant metal clamps ready to go as well. I had decided to coat the parts of the brackets that would be hugging the face of the control sticks with some rubber protectors to prevent scuffing. This threw our measurements off a little, but after some ratcheting of the bolts it was soon clear that these controls were not going anywhere in the near future. Huzzah! This wasn't the most asthetically pleasing arrangement, but it was a fine temporary measure to keep these controls rooted until I was ready for something more permanent.
So now with the controls firmly in place, I continue my quest to collect games together before installing the final version of Maximus Arcade and firing up the cabinet for real testing.
While the CPU, controls and display all work fine, the X-Arcade joystick was somewhat wobbly, as it was merely resting in the hole left vacant by the now trashed Tetris joysticks. My plan was to clamp these controls in place somehow to better resist the pulls and yanks on the joysticks from myself and over-zealous friends who would surely help me test this thing out.
 I enlisted my pal Eric Miller to help me, as Eric is a knowledgable craftsman and has a decent selection of tools at his disposal. He dropped by the Labratory and after taking a few measurements (including a hilariously bad schematic drawn by yours truly), we hit the Canadian Tire around the corner for some tools and hardware.
The plan was simple: I was wary of actually drilling into the X-Arcade unit at this point, since the final design of the cabinet had not yet been decided. So we were going to attack a flat piece of wood under the contols to act as a "shelf" for the controls to sit on. This shelf would have a series of L-brackets on the outer lip to help prevent the controls from sliding forward. And two more larger L-brackets would be clamped down at the top of the controls, thus preventing the controls from tipping when leaned upon.

 Of course, anytime I have money and walk into Canadian Tire I lose my mind and begin to purchase things I don't really need. So after a long time scrutinizing L-brackets and performing some imperial to metric conversions, I soon found myself with $50 worth of tools on top of the $8 in hardware we originally came to purchase, including some nice new Titanium drill bits and a dope multi-head screwdriver to replace the piece of shit that came with the tool set I had picked up months previous. Tools are fun, grunt grunt grunt.
Heading back home, we soon found a problem with the plan - both of Eric's batteries for his nifty cordless circular saw were dead as doornails. So it was back to Canadian Tire to buy a hand saw - sometimes, the basic shit is the best, it seems.

After cutting a piece of 1/2 inch plywood to fit, we soon had the shelf ready to go. We drilled a few holes and a few screws later the shelf was solid as can be, and the four brackets at the front worked like a charm. As a bonus, it could be pulled out when desired, which would surely help the refurbishing process down the line.

A couple more holes in the side and we soon had the two giant metal clamps ready to go as well. I had decided to coat the parts of the brackets that would be hugging the face of the control sticks with some rubber protectors to prevent scuffing. This threw our measurements off a little, but after some ratcheting of the bolts it was soon clear that these controls were not going anywhere in the near future. Huzzah! This wasn't the most asthetically pleasing arrangement, but it was a fine temporary measure to keep these controls rooted until I was ready for something more permanent.

So now with the controls firmly in place, I continue my quest to collect games together before installing the final version of Maximus Arcade and firing up the cabinet for real testing.
posted by Neil at 3:53 PM
![]()


1 Comments:
That is awesome.
Mine was all wobbly too! I am definitely going to try what you did. However, keep in mind that i am not as talented as you are so it will take me a long time and i might need a little assistance!
I will probably have my brother or my cousin help me out but this is a wonderful solution and i think it is ever so generous of you to put this up on your blog.
Thanks again,
Ken
Post a Comment
<< Home